Cropping Tool
Start with a 3D selection box containing one or more point clouds or models, and create a single 3D selection that is a subset, but in same format as the source. The new crop can be either what is inside the selection box or outside it. This means you can crop to split a point cloud or mesh model.
- Crop point clouds to get rid of unwanted points (e.g. clutter at the edges), and to reduce file size. This will make it quicker to build a mesh model.
- Crop models to create smaller models of specific areas. This reduces visual distraction and to makes zooming to the area of interest quicker.
You can crop when you have a mix of point clouds and models displayed in the viewport tab, but you can crop only one type at a time, to create a new file of the same type.
Cropping versus Clipping and Delete Selected Surfaces
Cropping is good for quickly removing points or parts of a model that fit neatly in the cuboid of a selection box.
Use the Clipping Tool to select individual surfaces in small parts of the model.
To selectively remove specific items, work with classified mesh models. You can hide or delete classifications, such as pipes or furniture. See Classification tools: Classify, Merge and Split Surfaces.
Crop Process
- Display the point clouds or mesh models you want to crop.
- Click Crop
 .
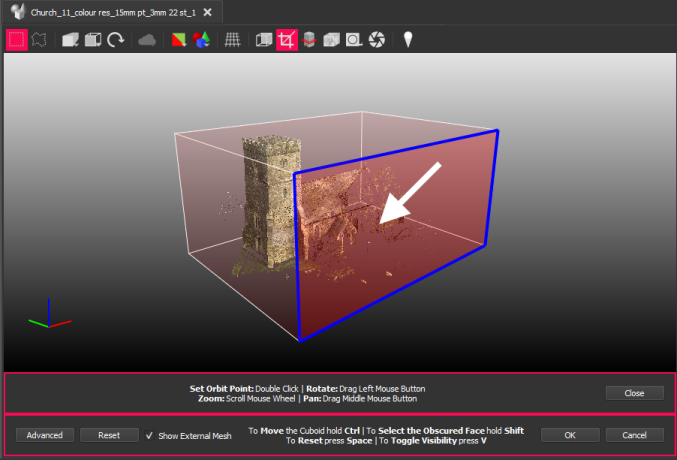
. - You see a cropping box, and when the cursor hovers over a face, it darkens:
If cropping a classified mesh model and you have removed some surfaces from view, they will not be included in the crop.
- Adjust the selection in the viewport or click Advanced to change the X, Y, and Z values directly. See Selection Tools, Controls, and Output.
- Click OK to open the cropping dialog:
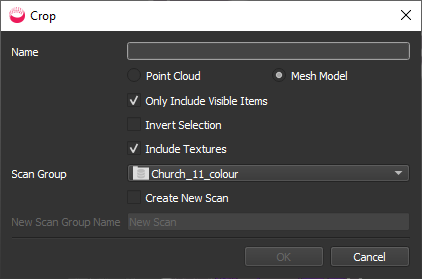
- Specify a Name for the cropped file.
- If you have a mix of Mesh Models and Point Clouds displayed, select which format you want to crop. The result will be a new, cropped file of the same type.
- If you have classified surfaces and hidden some from display in the Scene Tree (see Classified Mesh to BIM Model), choose whether to Include Only Visible Items.
- If cropping a mesh model, you can choose whether to Include Textures.
- By default, the contents of the selection box will be copied to the new file. If you want to remove the selection, check Invert Selection.
- Either select an existing Scan Group from the dropdown list, or check Create New Scan and specify New Scan Group Name.
- Click OK.
- The result is added to the specified scan folder in the Project Explorer but is not displayed in the viewport.
- You can split a point cloud or mesh in two by clicking OK again to re-open the cropping dialog, then check Invert Selection and click OK to create a new cropped file containing the other half.
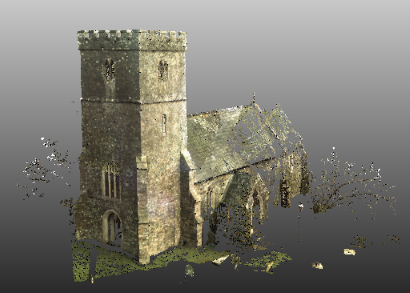
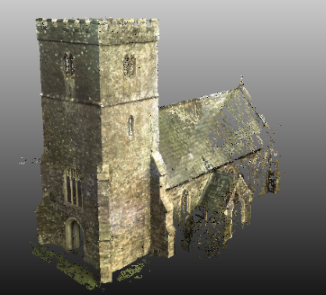
- Display and compare the results in the viewport. For example:
|
|
mm |
|